
Click to Zoom
7:30 am - 5:00 pm
Closed

Store Hours
| Sun | CLOSED |
| Mon | 7:30 am - 5:00 pm |
| Tue | 7:30 am - 5:00 pm |
| Wed | 7:30 am - 5:00 pm |
| Thu | 7:30 am - 5:00 pm Closed |
| Fri | 7:30 am - 5:00 pm |
| Sat | 10:00 am - 1:00 pm |
About
Welcome to Ideal CARSTAR Auto Body
Auto Body Repair Experts in Littleton CO
Ideal CARSTAR Auto Body provides high quality auto body repair performed by expert technicians. We offer 24/7 accident assistance, towing assistance and rental cars to get you back on the road as quick as possible. We ... Read More
Auto Body Repair Experts in Littleton CO
Ideal CARSTAR Auto Body provides high quality auto body repair performed by expert technicians. We offer 24/7 accident assistance, towing assistance and rental cars to get you back on the road as quick as possible. We ... Read More
Articles
- The Best Car Battery On The Market The Best Car Battery On The Market There are a lot of options when it comes time to change your battery. There are also a lot of factors to tak...
- Another Great Concept Car: The Chrysler Atlantic Concept cars are design experiments and most of them never go past the concept stage. Many of them end up being forgotten (Remember the Renault Racoon...
- The Right Things To Do When You're In An Accident They happen randomly to all of us and that's why they call them accidents. If you know someone that has gone through life without being involved i...
- Top 5 Rock Star Super Cars At CARSTAR Ideal Auto Body Littleton, we love that rock and roll music and we also love cars in Littleton, CO. Whatever you drive or listen to, ...
- How To Fix Your Car's Minor Scratches For more serious scratches on your vehicle's exterior, you should always consult a professional, including all of us at CARSTAR Ideal Auto Body Li...
Share
Photos


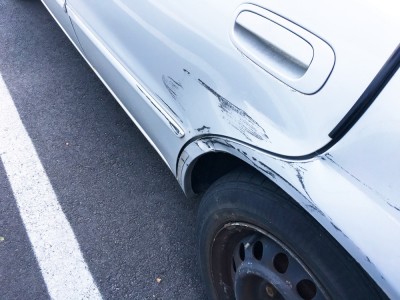 For more serious scratches on your vehicle's exterior, you should always consult a professional, including all of us at CARSTAR Ideal Auto Body Littleton. We often see some serious scratches in Littleton, CO and most of the time they are caused by debris on the road, vandalism or weather-related events.
Social